it’s time for some new strobist photos. When I have seen the first time a ring light shot, I thought that is something that I want to do, too. But checking out the prices of ring lights stopped my enthusiasm immediately. 300$ or more is a little bit too much for 4 or 5 shots of an amateur. But the effect is really cool, how can I get it cheaper.
The complete magic of ring light is, that the light surrounds the lense. Thus, it is direct light that is relatively harsh. But because it surrounds the lens, it doesn’t produce any clear shadows. If you have a white a background, it also generates a nice shadow halo around the head of the person. A face with nice make up or a character head are nice objects for a pure ring light shooting like this.
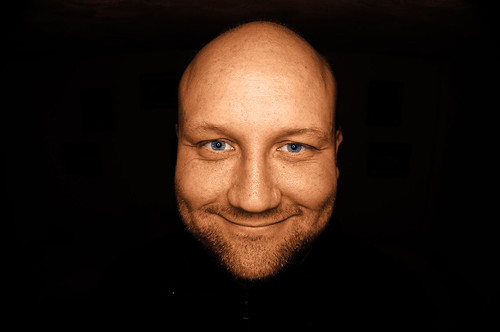
The photo above it the result of my DIY ring light. I got the idea from a post on the strobist blog (here). You can see here a photo of my version.

Main ideas of my ring light:
I used also two different sized plastic bowls and tapped them inside with silver foil. I cuted a hole on the top of the outer bowl to let the light of my flash get into the ringlight (This is a relatively short way, thus very efficient. The top position of the flash ensures that the halo effect in the background doesn’t get too big). The flash should direct to one of the inner wall and not directly out, to ensure a nice distribution of the light around the ring. To make the distribution even wider and smoother, I added a diffuser around the light. I would set the flash to the widest possible angle to increase the distribution of the light. The flash is triggered in this position with a radio remote trigger.
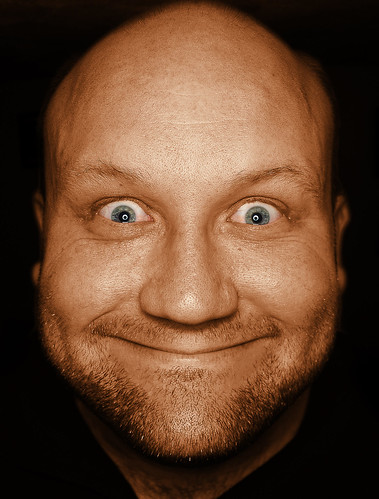
–> The result is a almost even distributed ringlight, with a not bad efficiency (You see the light distribution in the second shot).
In the photo above I used this ringlight with a black background. f4 with 1/60 and ISO 100. I also used the lens adapter that you know from my ultra-wide shot post (here) with a 18mm lens –> 9mm. This results in this crazy distorted look.
The final photo is converted into a tri-tone photo, where I used the skin color as third color between black and white. Only the eyes are kept in the original colors.
I hope you like the result and please tell me about your experience with DIY lighting.
All the best
Werner
related post:

How-To: The Model-Look – Basic Portrait Enhancement

A great and idea. I’m toying with the ringflash idea myself and this post convinced me that it will work.
Regards,
Rob
Maastricht